Quick start of Spring Boot
Step1. Start a new Spring Boot project
Use start.spring.io to create a “web” project. This article How to use Spring Initializr in Intellij to build a Spring Boot project” introduces how to use Spring Initializr to build a Sprint Boot project.
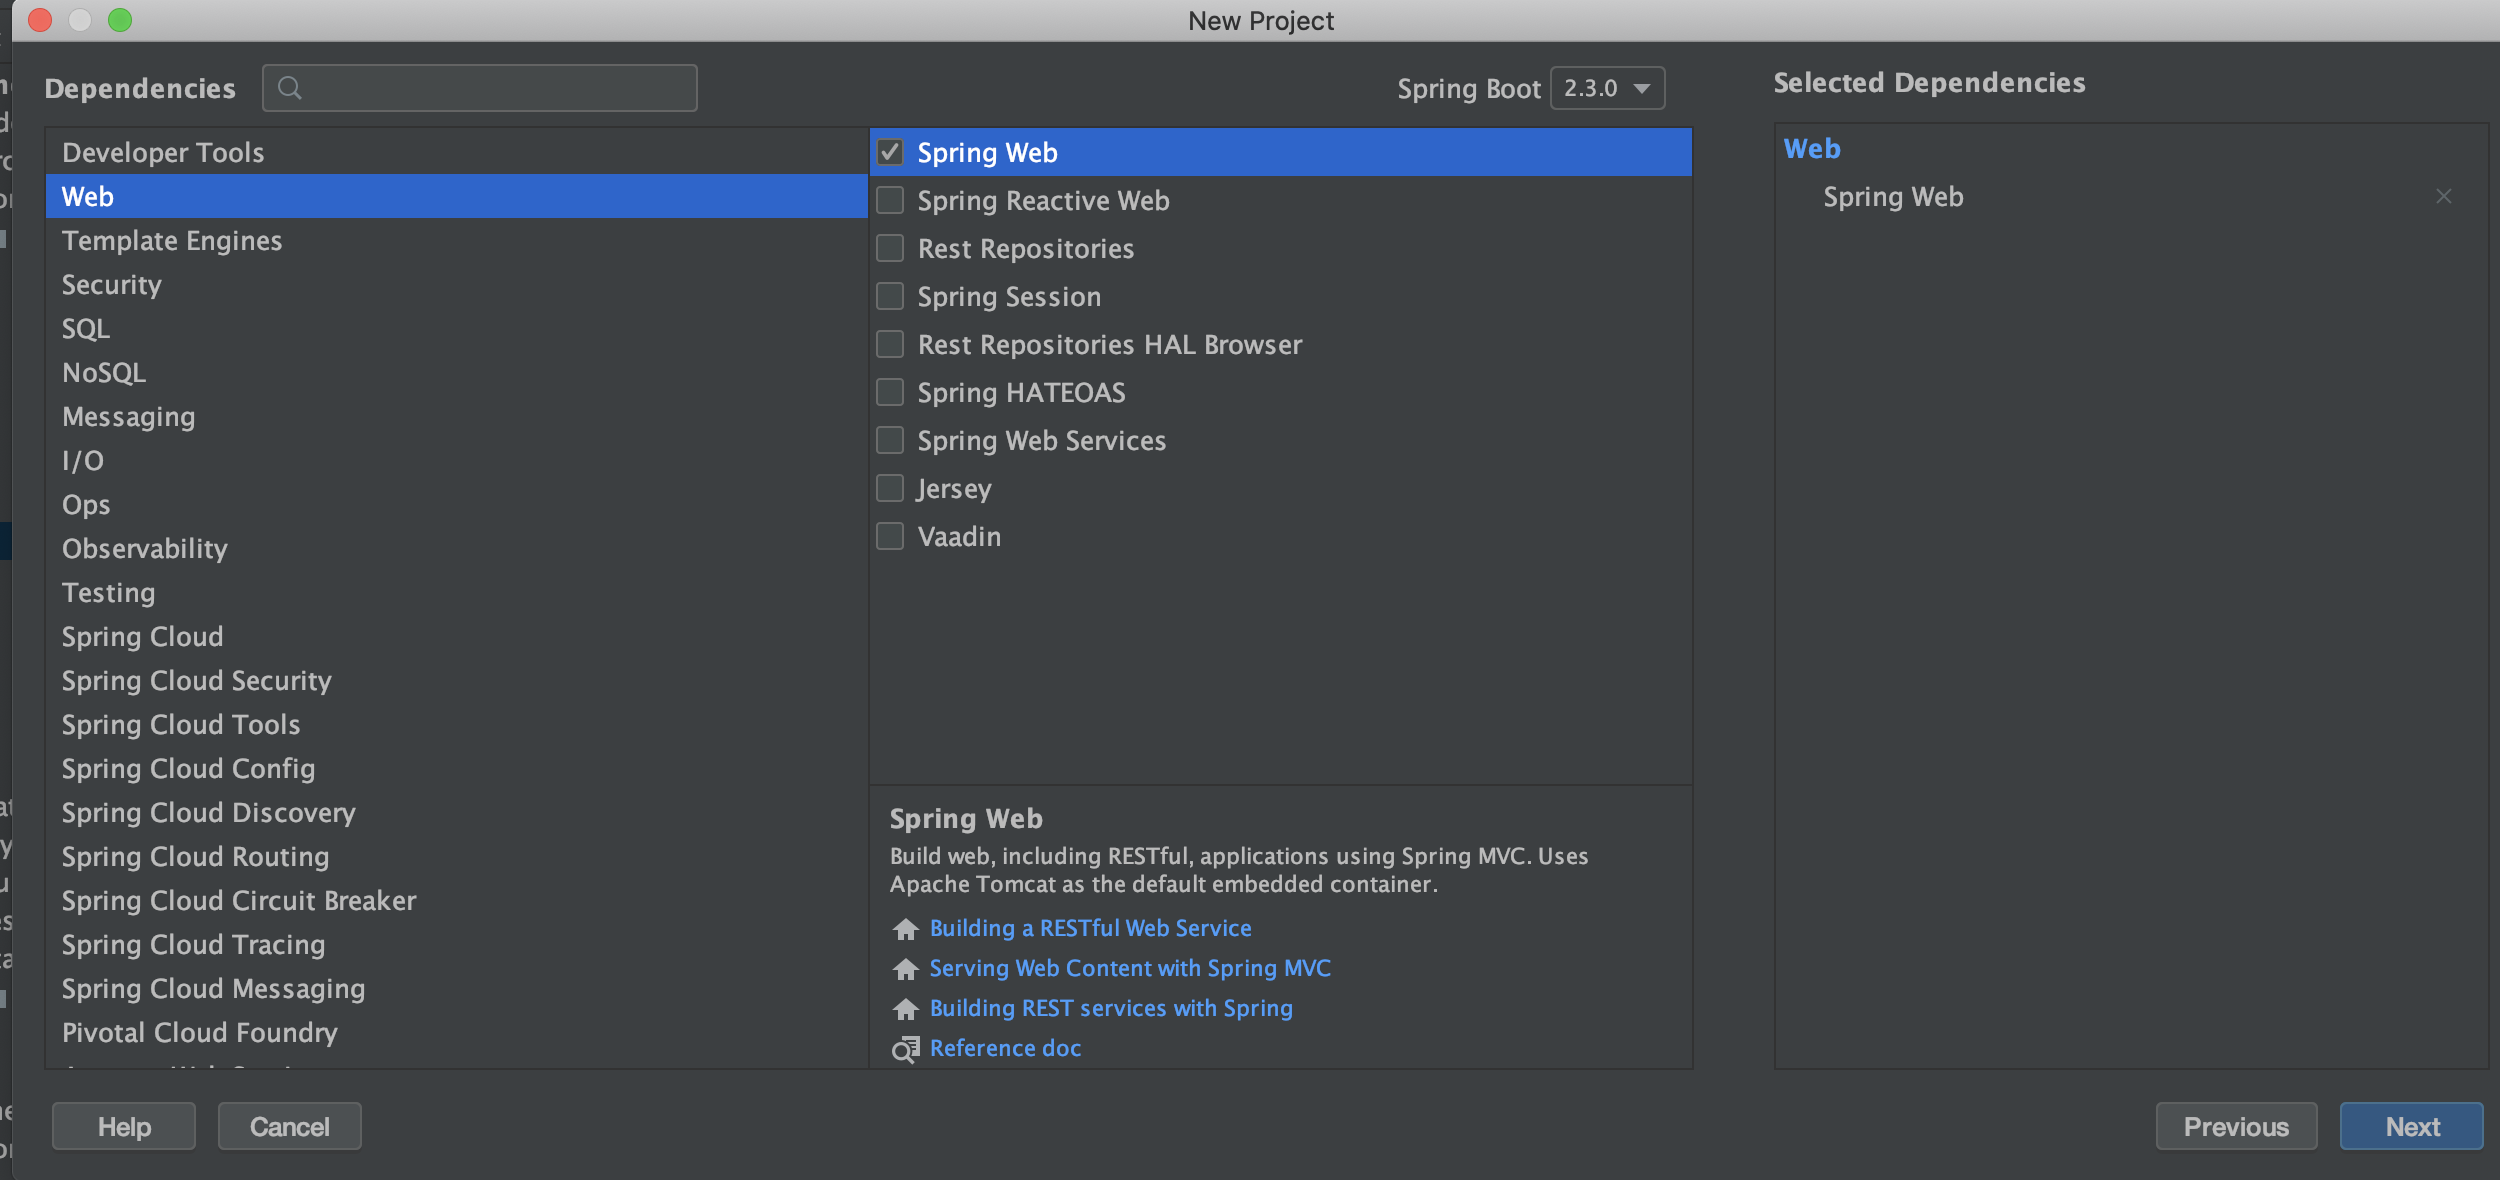
In the “Dependencies” dialog search for and add the “web” dependency as shown in the screenshot. Other options can be set as default.
Step2. Add your code
Open up the project in your IDE and locate the DemoApplication.java file in the src/main/java/com/example/demo folder. Now change the contents of the file by adding the extra method and annotations shown in the code below. You can copy and paste the code or just type it.
package com.example.demo;
import org.springframework.boot.SpringApplication;
import org.springframework.boot.autoconfigure.SpringBootApplication;
import org.springframework.web.bind.annotation.GetMapping;
import org.springframework.web.bind.annotation.RequestParam;
import org.springframework.web.bind.annotation.RestController;

@SpringBootApplication
@RestController
public class DemoApplication {


    public static void main(String[] args) {
        SpringApplication.run(DemoApplication.class, args);
    }

    @GetMapping("/hello")
    public String hello(@RequestParam(value = "name", defaultValue = "World") String name) {
        return String.format("Hello %s!", name);
    }

}
The hello() method we’ve added is designed to take a String parameter called name, and then combine this parameter with the word "Hello" in the code. This means that if you set your name to “Amy” in the request, the response would be “Hello Amy”.
The @RestController annotation tells Spring that this code describes an endpoint that should be made available over the web. The @GetMapping(“/hello”) tells Spring to use our hello() method to answer requests that get sent to the http://localhost:8080/hello address. Finally, the @RequestParam is telling Spring to expect a name value in the request, but if it’s not there, it will use the word “World” by default.
Step3. Try it
Let’s build and run the program. Run the DemoApplication.java file. You should see some output that tells you your project is running.
Spring Boot’s embedded Apache Tomcat server is acting as a webserver and is listening for requests on localhost port 8080. Open your browser and in the address bar at the top enter http://localhost:8080/hello.
Then you will see “Hello world!". If you input ?name=Amy to the end of URL, you will see “Hello Amy!".
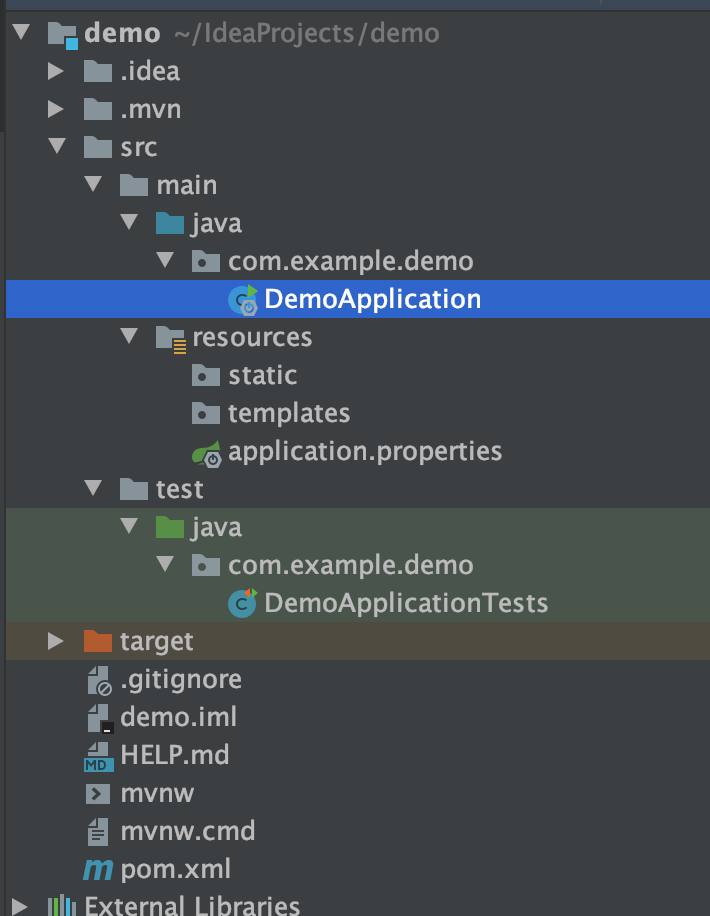
The structure of a Sprint Boot project
There are three basic directories.
- The entry of the program under
src/main/java: TheDemoApplication.javafile. - Configuration file under
src/main/resources:application.properties - Test files under
src/test/:DemoApplicationTests
You can also check pom.xml file to see all dependencies we have installed.